Interfacing the Wiring hardware using MIDI protocol
This tutorial introduces the basic interfacing of the Wiring hardware with the MIDI protocol using a Serial converter. The brief for the tutorial will be to read simple values from the Wiring board using the MIDI protocol to Ableton Live http://www.ableton.com/. It assumes the Wiring software and Ableton Live are installed and the proper Wiring setup has been previously completed. For more Information on Wiring install check out the tutorials about Wiring installation and software setup.
Note: This tutorial is based on the tutorial made by SpikenzieLabs wich can be found it here
Step 1
Copy and paste the following code on the Wiring editor: Verify your program is free of compiling errors by pressing the Compile/Verify button in the menu bar. Press the Upload button in the menu bar. In case of syntax errors the Wiring environment will print the error messages otherwise it will print the Upload was completed successfully, the uploading process triggers activity in the Rx/Tx LEDs on the Wiring hardware. The new program will start automatically after uploading. Use the Serial Monitor button to watch the data coming from the Wiring board, then close the Serial Monitor again.
/**
 * Switch / MIDI

 *
 * Reads values from a switch connected to the
 * digital input pin 8.
 * http://wiring.org.co/learning/basics/switch.html
 */
void setup() {
  // Set MIDI baud rate:
  Serial.begin(57600);
  //Switch pin
  pinMode(8,INPUT);
  //WLED
  pinMode(WLED,OUTPUT);
}

void loop() {
  if(digitalRead(8)==HIGH) {
    //Note on channel 1 (0x90), some note value, middle velocity (0x45):
    noteOn(0x90, 1, 0x45);
    digitalWrite(WLED,HIGH);
  }
  else {
    digitalWrite(WLED,LOW);
  }
}

//  plays a MIDI note.  Doesn't check to see that
//  cmd is greater than 127, or that data values are  less than 127:
void noteOn(int cmd, int pitch, int velocity) {
  Serial.write(cmd);
  Serial.write(pitch);
  Serial.write(velocity);
}
Step 2
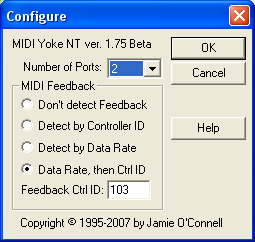
Windows:
Download MIDI Yoke from MIDI-OX here.
After installing MIDI Yoke, it recommended to go into Control Panel and change the port. You will need to reboot after changing the number of ports.
Mac OS X:
Note: Apple has released a Java update the reintegrates native MIDI support into the Java. This means that as of Apple’s Java 6 update, you will no longer require mmj.jar and libmmj.jnilib.
Step 1
Install Apple's Audio MIDI Setup (comes with your OS, in your Applications folder / Utilities) and mmj which can be downaloaded here.
Step 2
Copy mmj y libmmj.jnilib in /Library/Java/Extensions.
Step 3
Run Audio MIDI Setup, then double click on the IAC Driver.
Now in the IAC driver, click the “More Information” triangle if it is not showing already.
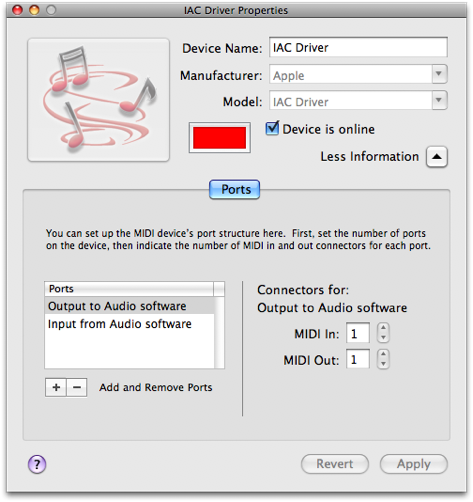
Step 4
In the lower left; double click the MIDI port name to edit it and click the + to add a new port.
Step 5
Important, check the “Device is online” box or nothing will work
Step 6
Click “Apply”, and now you are done. You may quit the Audio MIDI Setup software, it does not need to be running for the SM to work.
Step 3
Download the software SM here.
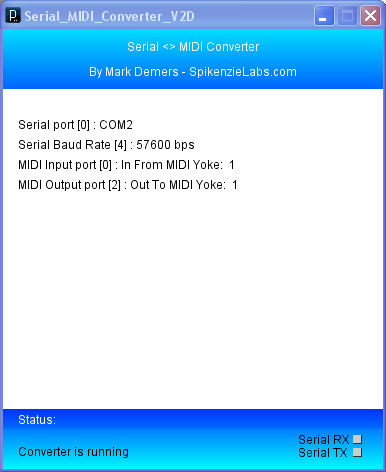
Step 4
Run the software Serial MIDI Converter. Choose the port, the baud rate, the MIDI-in port, and the MIDI-out port.
Step 5
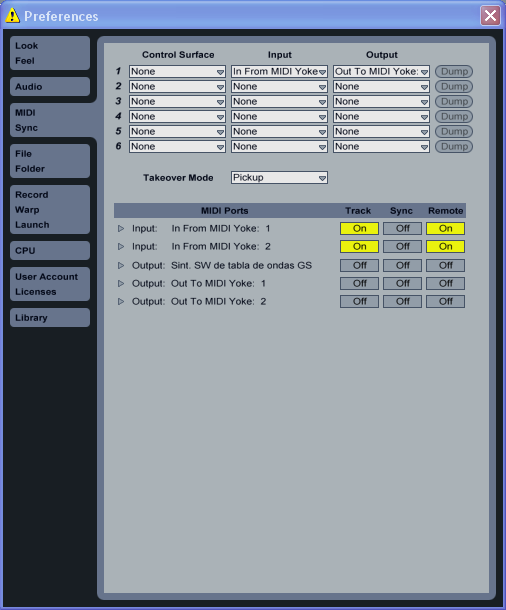
Abra y ajuste Ableton Live. Abra las preferencias y dirijase a MIDI Sync. En Control Surface eljia None, en Input elija In From MIDI Yoke: 1 para Windows o IAC Driver (Input from Audio Software) para Mac OS X y en output elija Out From MIDI Yoke: 1 para Windows o IAC Driver (Output to Audio Software) para Mac OS X.
Step 6
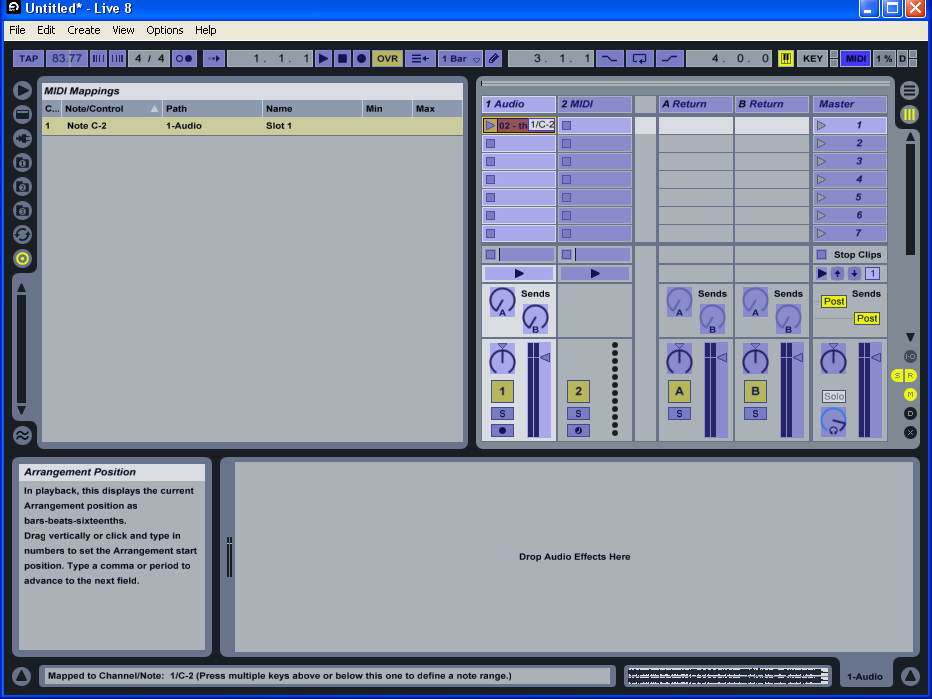
Set the MIDI map.